Tutorial: Watercolour nebula paintings
Short tutorial how to paint nebulas, galaxies and stars with water colors. You can create space art from your imagination, but in this series I wanted to create something scientific accurate and realistic, so I used Nasa Hubble photos as a reference.
Painting Monkey Head Nebula (NGC 2174)
Needed materials:
- Watercolor paints (I used 24 x half buttons from Winsor & Newton)
- Good paper (I used 300 gsm A3 cold pressed) to handle lots of water
- Masking fluid, to block highlights and major stars
- Brushes
- Large mop or similar for watering the paper
- Large and smaller round brushes
- Small detail round for highlights
- Expendable small brush for applying masking fluid
- White gouache paint for stars
- Optional: Acrylic white paint
-
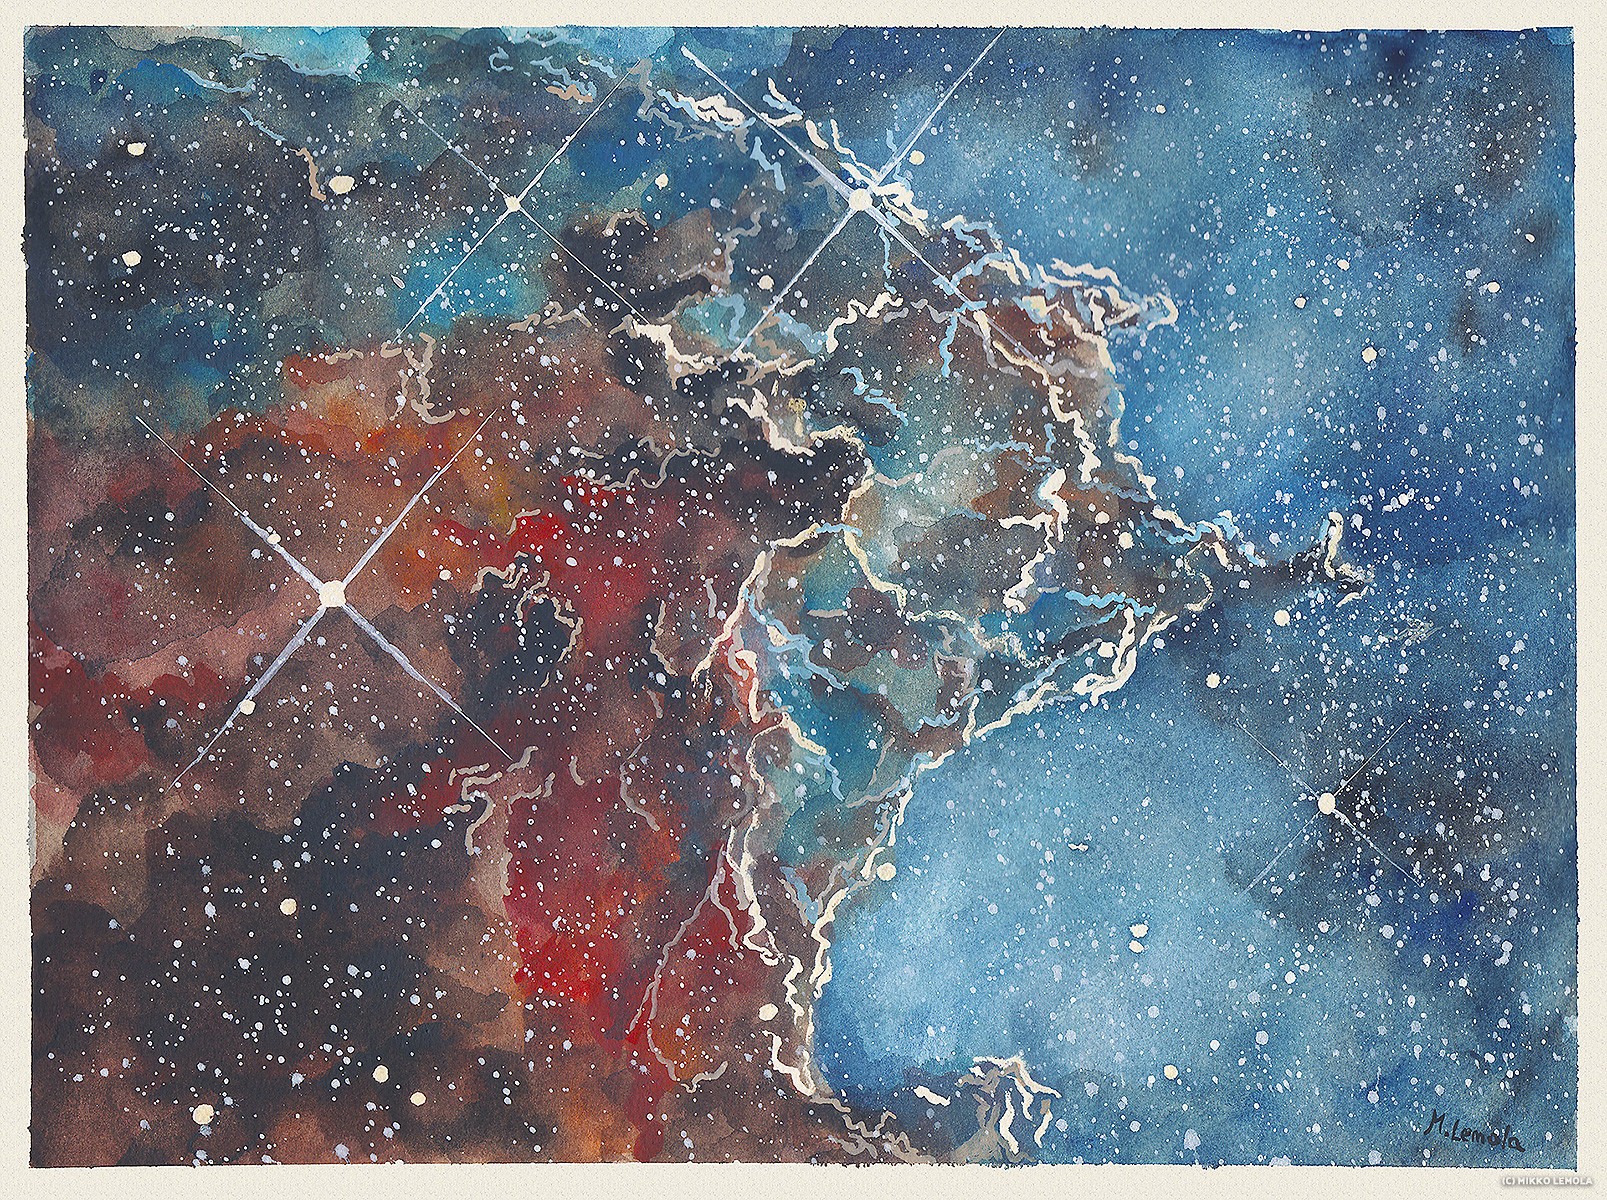
- Monkey Head Nebula
Painting steps:
1. Pencil sketch and masking fluid
Draw a simple sketch with pencil to mark main areas and most important stars. Don’t press too hard with the pencil, we don’t want the pencil marks to be visible at the final painting. Still, painting will be pretty dark, so it should not be a problem.
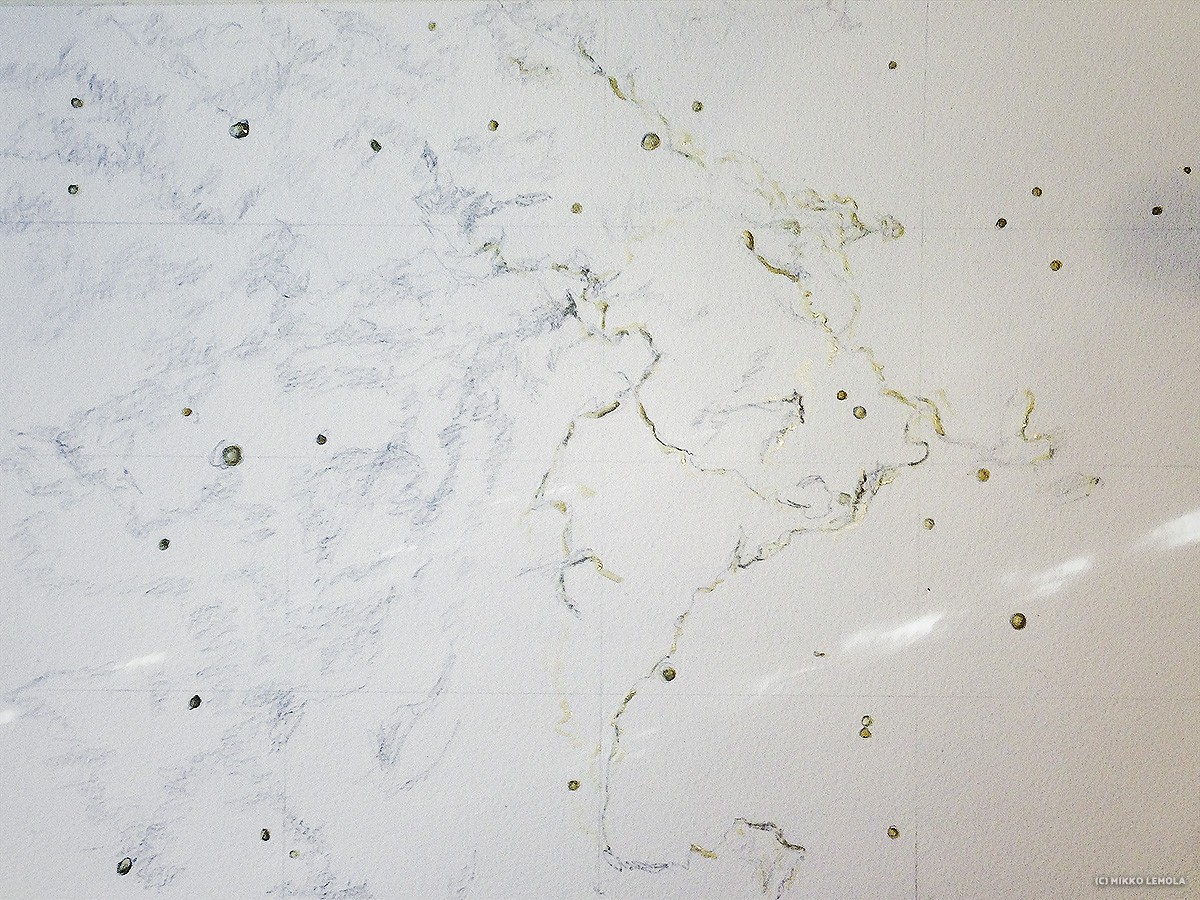
Apply masking fluid with small detail brush to couple largest stars and outlines of the backlit nebula dust. We will remove the dry masking fluid from the paper later. You don’t need to mask too many stars, we well create those lastly.
2. Wash and the layers of color
Painting will be very dark and saturated, so you will probably need to apply at least two or three layers of colour to get pigment deep enough.
After masking fluid is dry, soak the paper completely with large brush and let it rest couple minutes. When paper is still relatively wet, start applying colours with a large brush with lots of water.
In deep space parts of the painting, use strong blue colours, base with Ultramarine blue and while it is still wet, add large drops of Cobalt or Cerulean blue to create variations. Some black can also be used, but the first layer should be rather light.
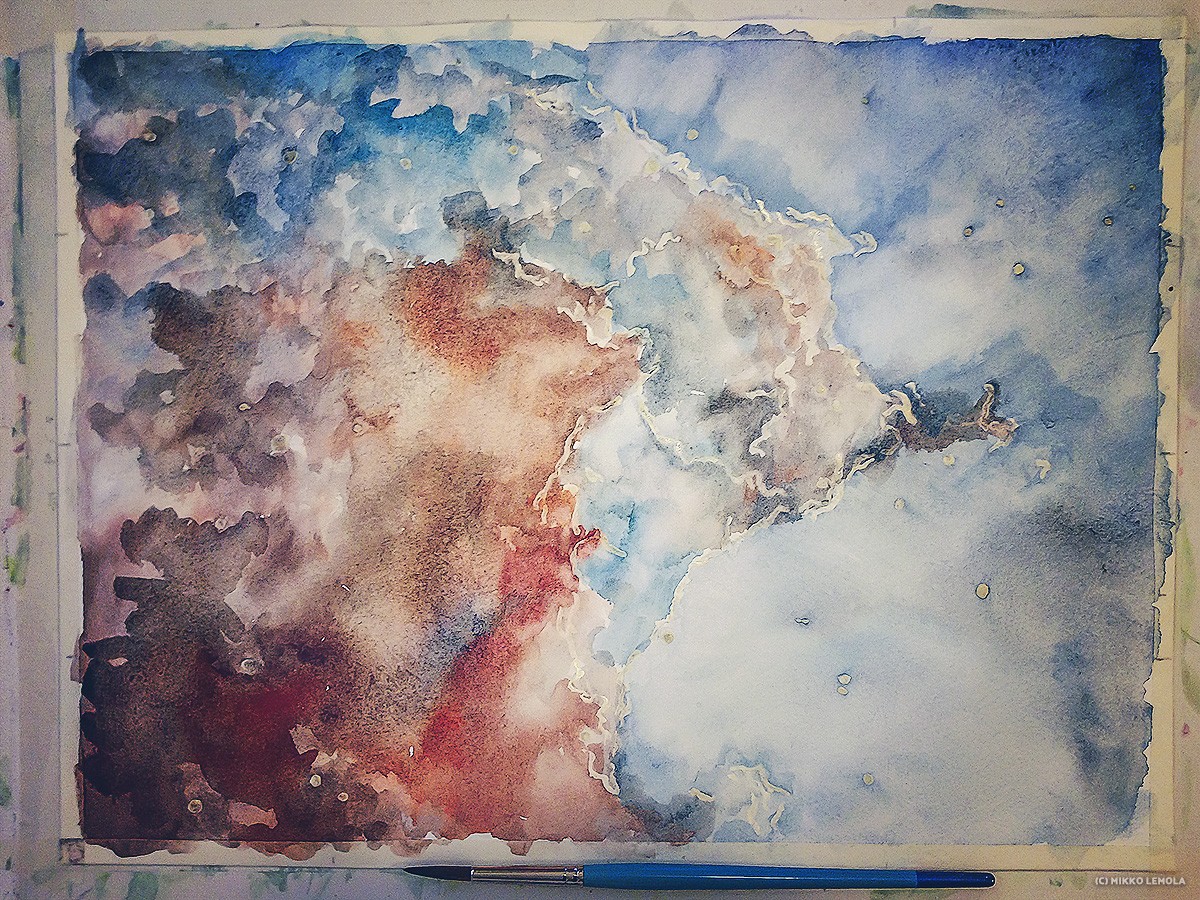
In nebula gas area, create variations with desired colours. In this warm toned painting, I varied from warm Cad Orange to small areas of cooler Alizarin Crimson. Depending on what colour you want your nebulas to be, you can use cool violets and greens too.
Let the first layer dry properly and apply another layer to deepen the pigment.
3. Painting highlights with white
Next, let paper dry completely before continuing.
Remove masking fluid by rubbing carefully paper with fingers and use eraser to clear pencil marks still visible in the masked areas.
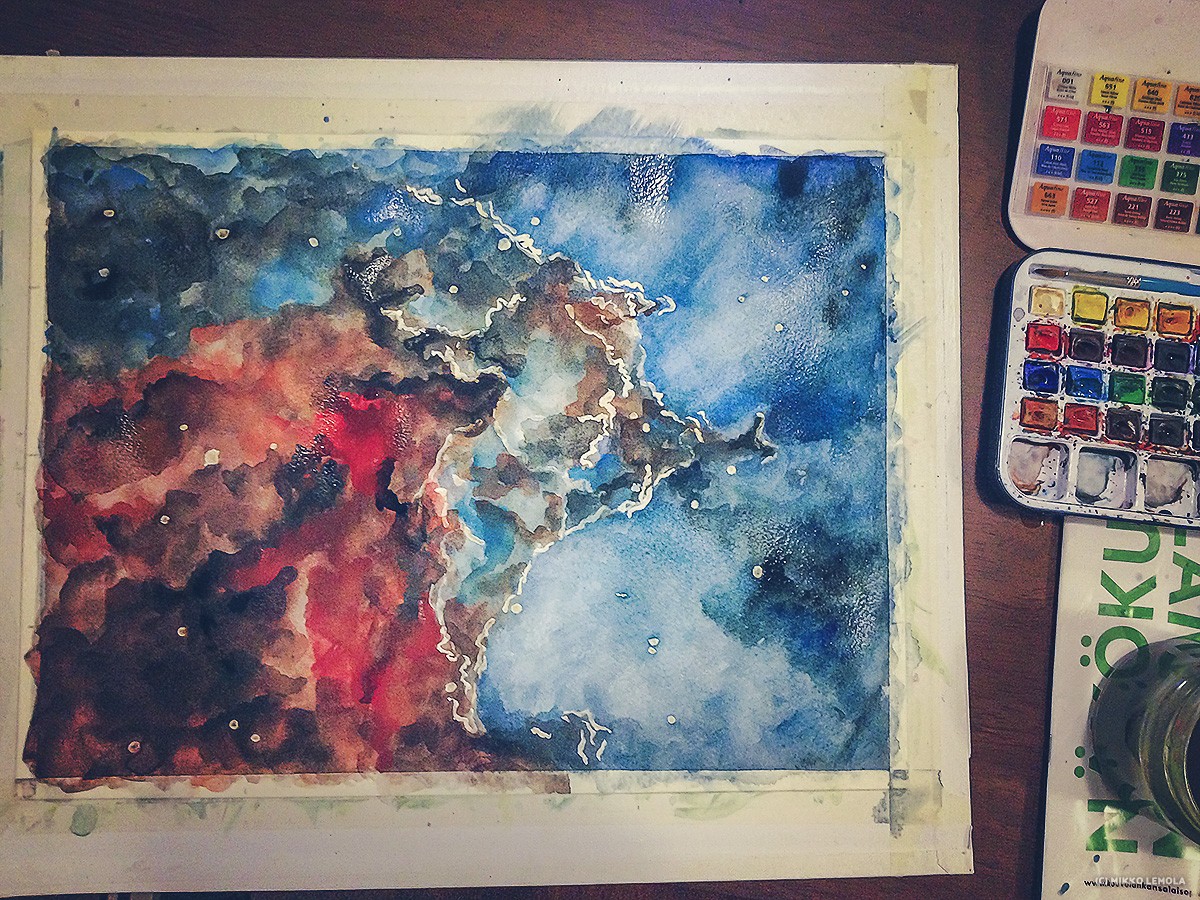
Take white gouache paint with mixed to water and outline the nebula borders. You can also add small amount of similar colour to the mix. White gouache looks strong, but when it is dry, it won’t look too out of the place.
Paint straight rays to the largest stars using ruler.
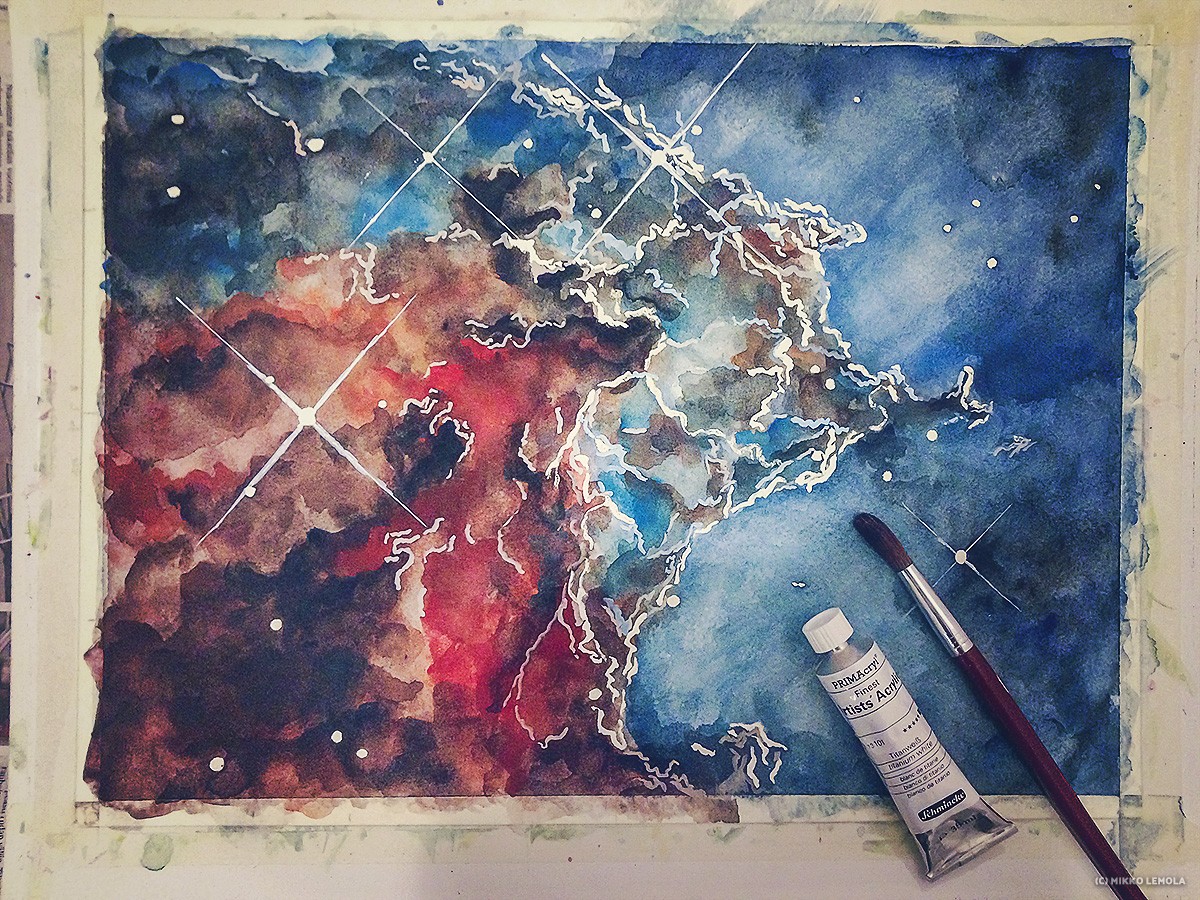
4. Adding loose stars
Take a large round brush with lots of white paint and some water on it. You can use white gouache also, but I recommend using white acrylic paint. Effect is stronger with acrylics aka brighter stars and more contrast.
Create splatter of stars by knocking / tapping your brush over the painting against handle of a another brush to create lots of small splatters of white colour. It is the funniest part but don’t go overboard with it, let it dry before adding too much stars.
Note: Creating the splatters can be pretty messy, so cover you painting area if needed 😉
…
Another examples with the same technique
-
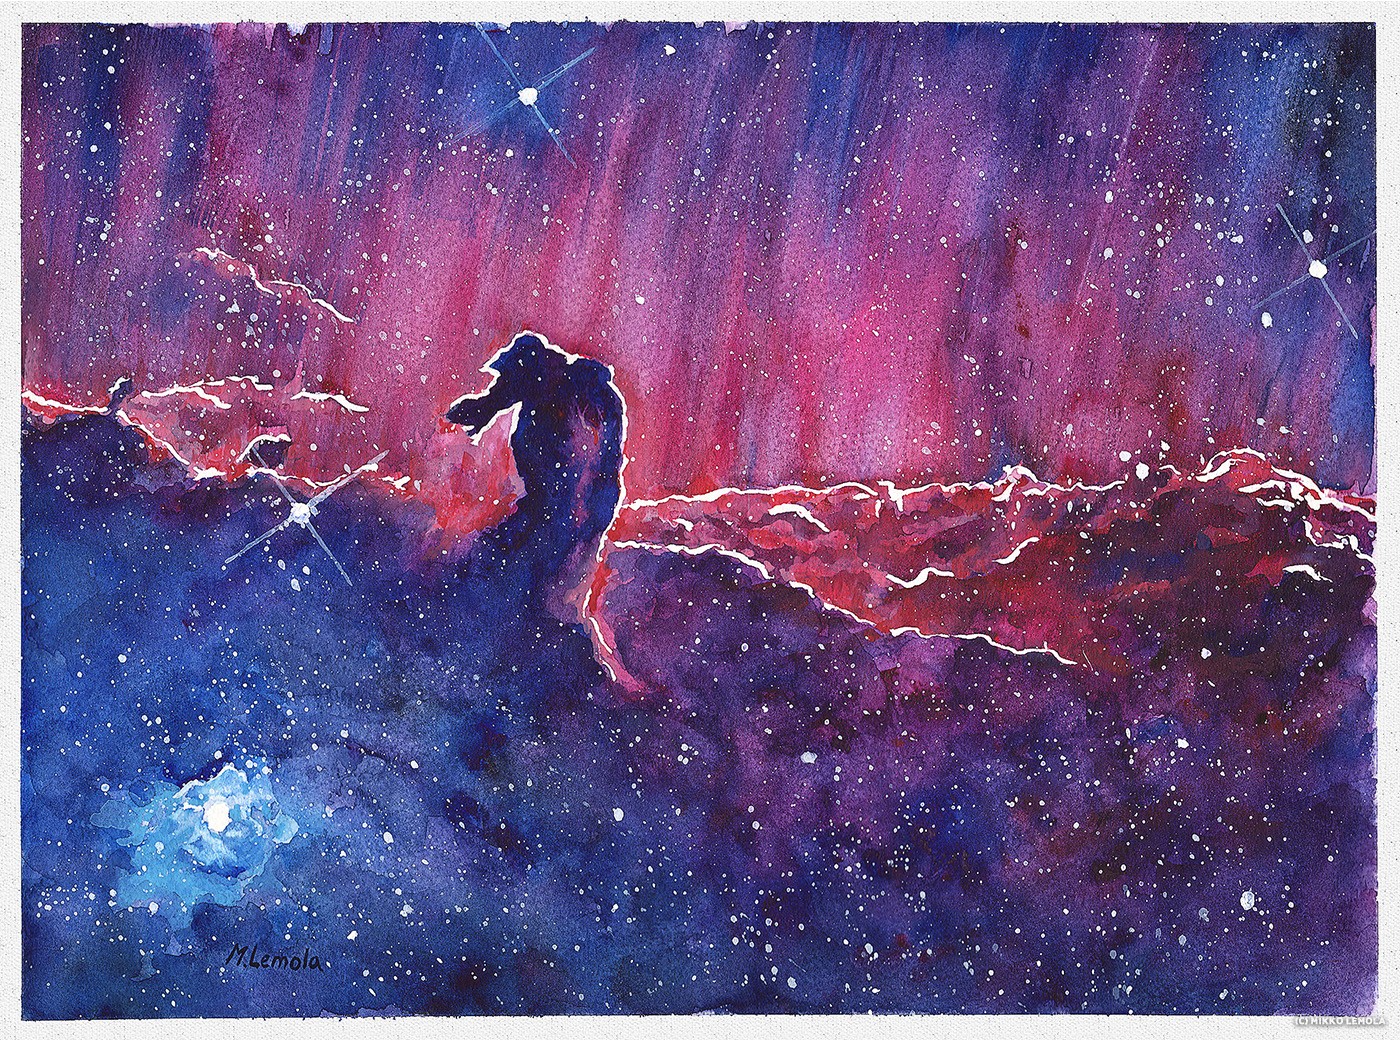
- Horsehead nebula (Barnard 33) in the Orion
-
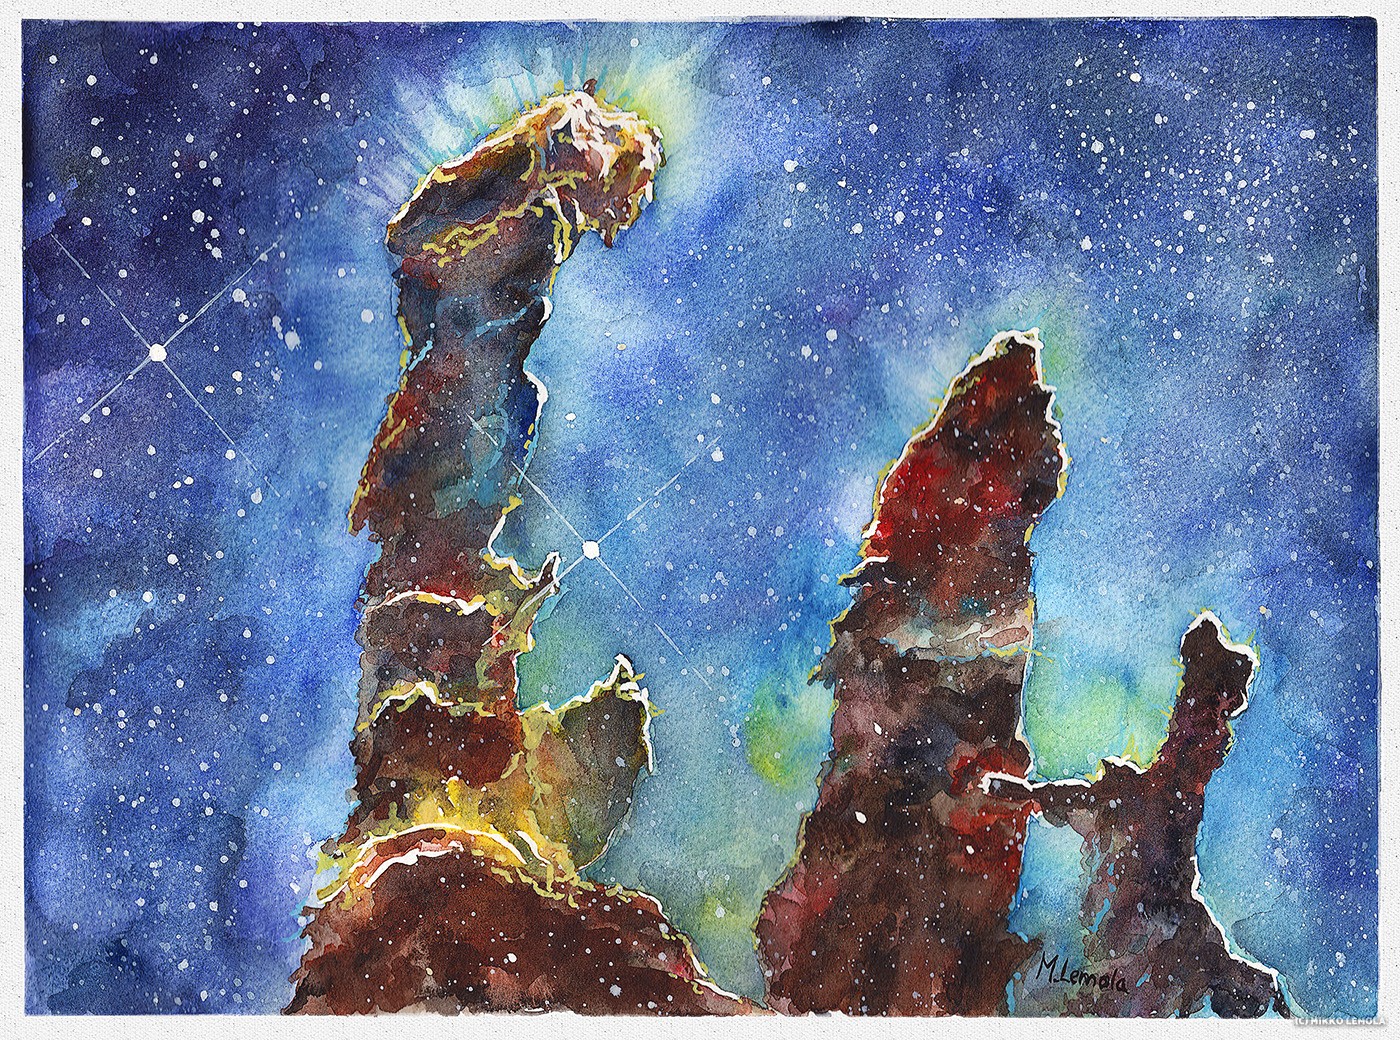
- Pillars of Creation in the Eagle Nebula (Messier 16)